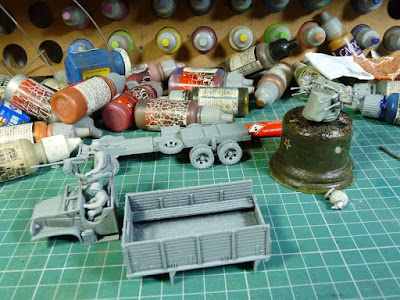
Heya,
It's been a while but recently real life grabbed my balls pretty hard and refused to release 'till now. There's been just everything: kids, home, job, studies - friggin nightmare.
Deeply hope to catch some air during summer and paint something (anything!!!) more for my Bolt Action Americans. Some gaming also wouldn't hurt...
So what's about the truck?
Long story short I got it last year as a gift.
Although I needed small transport for my engineers (Dodge 3/4 would be just perfect for the task...) my brother delivered big ass truck instead:
model itself is really nice and well casted, there are different assembly options etc, but sadly for small scale games we're having here fielding Deuce and Half is just waste of preciousss points and loading space.
Not mentioning the fact loading too much infantry on a single transport is kinda risky...
So the model has been assembled, undercoated and as it turned out later - spent next few months waiting for fuck knows what.
I've always liked M16 MGMC anti-aircraft battery model. Not sure about it's gaming usefulness, but 4 heavy machine guns seems just damn nasty against enemy infantry!
Just imagine that pink mist and zee German bits flying everywhere after a salvo... Yum!
Just imagine that pink mist and zee German bits flying everywhere after a salvo... Yum!
Original model uses tank "slot" in reinforced platoon so sadly - I don't need it BUT I thought having such thing in display case would be nice.
Especially there was truck chassiss waiting for development...
After quick research I learnt during world war 2 quad heavy machine guns batteries were placed on half tracks and on trailers. There were also stationary anti-aircraft emplacements.
I thought my soiders are clever and resourceful enough to place one on slightly modified truck (such vehicles were actually used during Vietnam war, not sure about WW2).
So I got the battery:
Prepared model for the field surgery...
Some cutting and breaking...
And it's done!
I tried to paint it with airbrush - result isn't exactly what I was hoping for but it's still promising.
I started with dark brown base followed by 3 tones of green:
Next stage - details:
tires, gas canisters, some chipping:
Da crew:
All bits put together...
Weathering.
It's something new for me - usually I simply load lots of chalk and seal it with varnish but this time model was airbrushed with very diluted sand yellow and then some chalk applied.
Quite acceptable solution:
All paint is dry so model has been covered with solid layer of Revell matt varnish (it's gaming model after all) and here's the final result:
The thing wouldn't happen without great customer service from Warlord Games - thanks a lot Robin! ;-)


