Thursday, September 17, 2015

Lich Lord (not Lichemaster though) - review and walkthrough, part 5

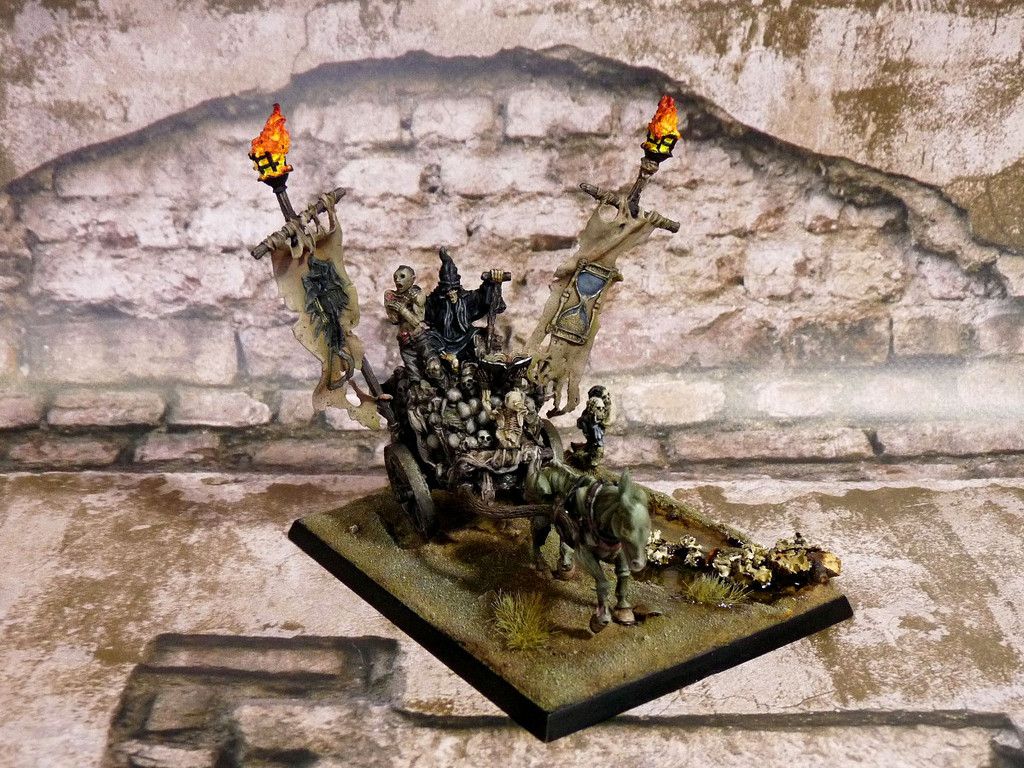
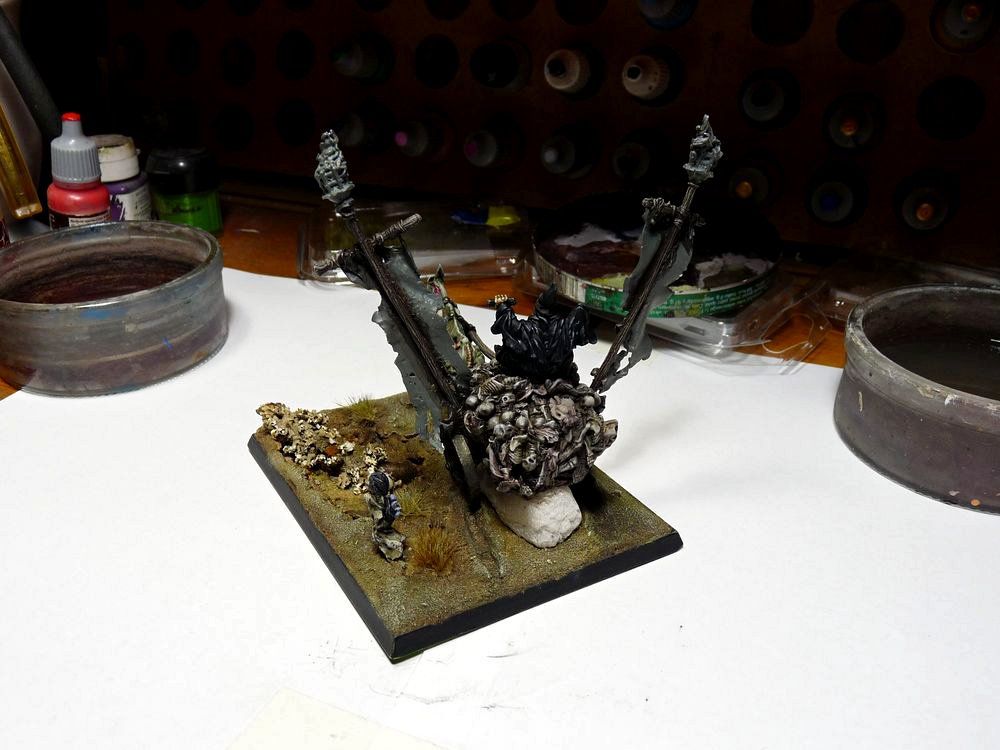
It is finished! The paintjob is done!
Finally! That was traumatic experience and it's SO good to have it behind me.

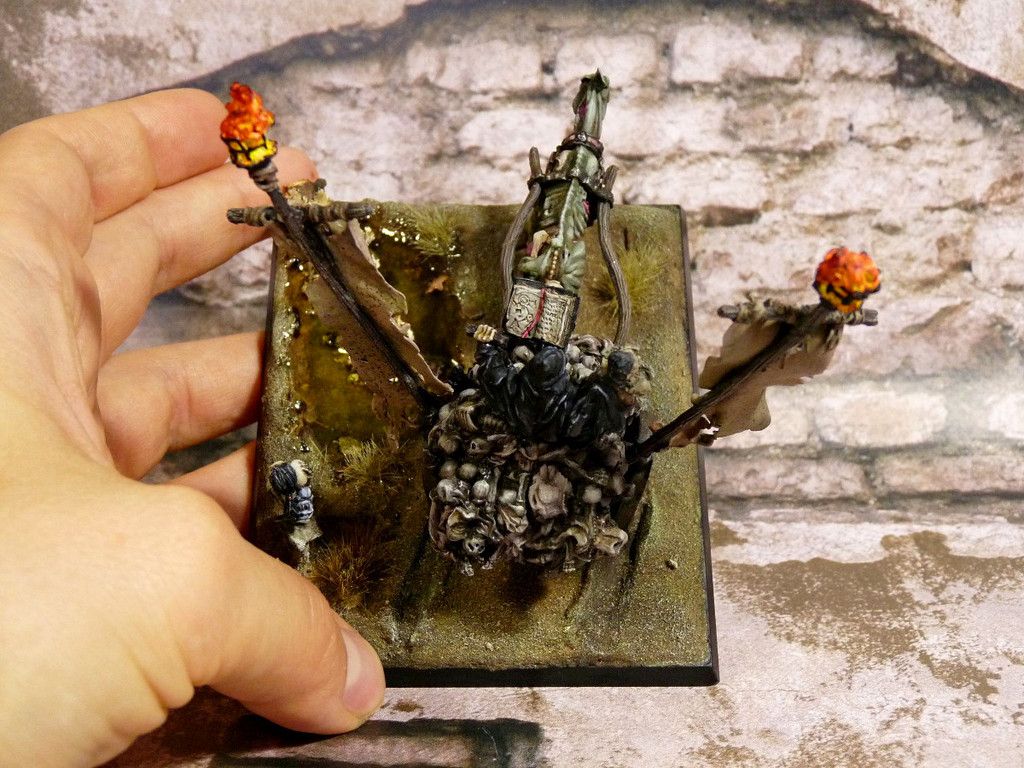
As I wrote it the previous posts working on this thing was huge pain in the ass. I think the worst thing was assembly - that is model had to be painted assembled so manipulating was just very uncomfortable. Best example - banners. Painting them separated would be much easier and would bring better results than what you can see. I also didn't like sculpted sandglass and death - I'd prefer these banners plain or sculpted a'la Henrich Kemmler's apron - assembled bits of face skin. Really grim and totally badass!

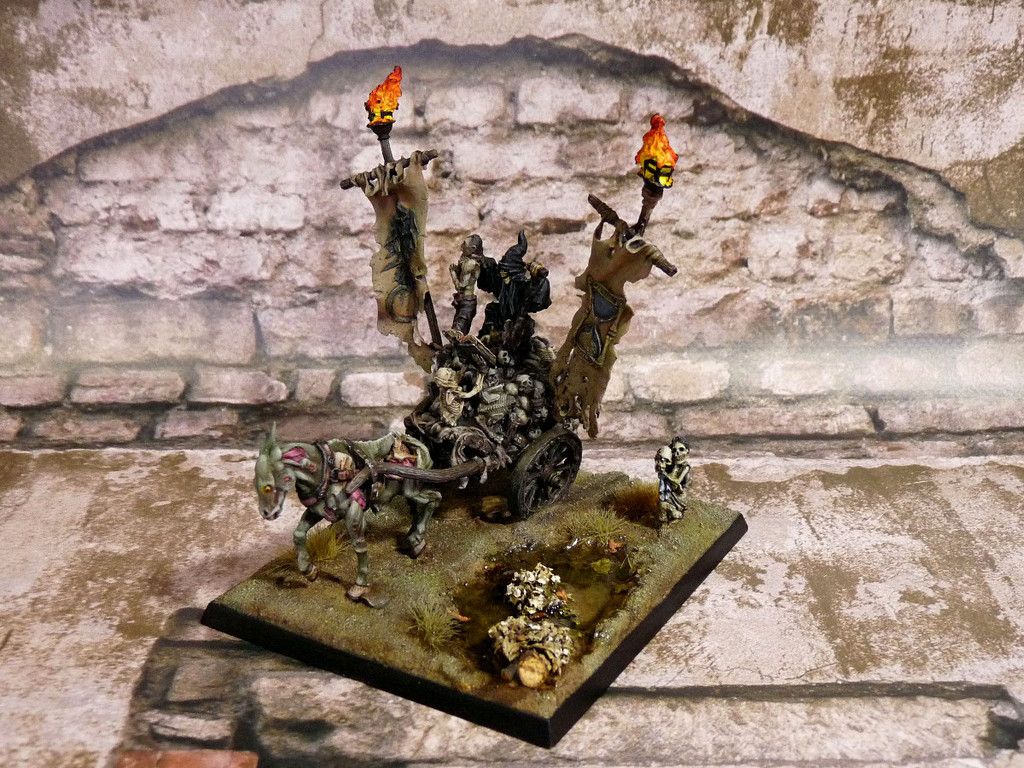
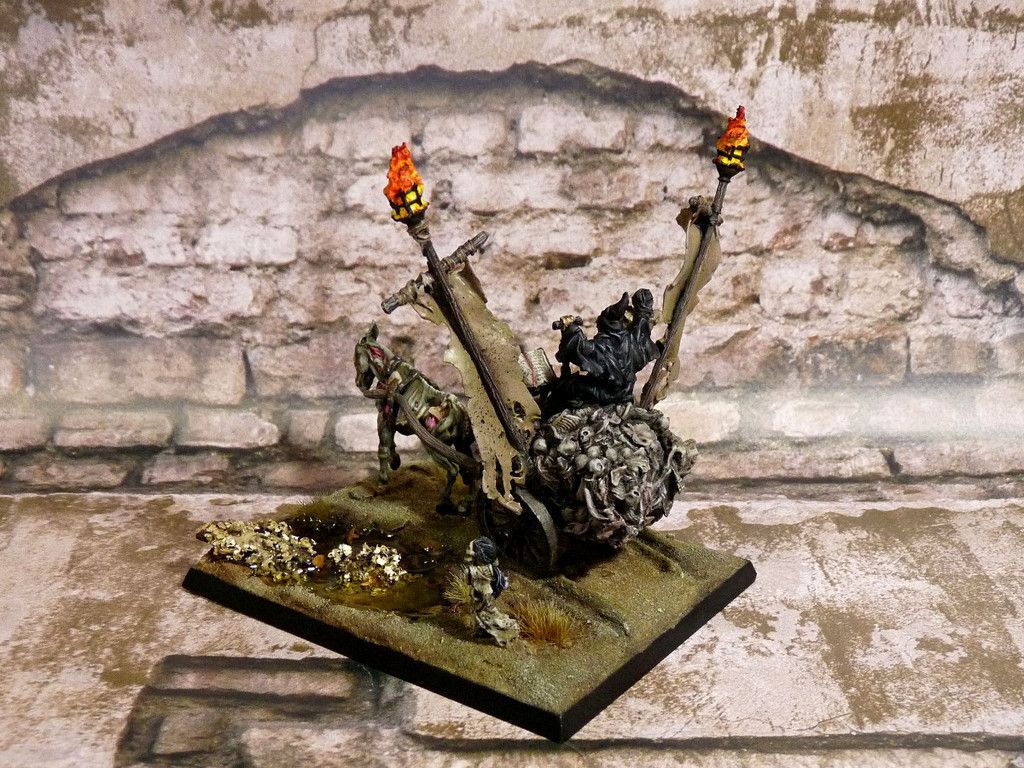
As for the good things: all in all I like it, it's pretty striking sculpt which will surely pop out of infantry regiments. It's messy but I wouldn't expect anything cleaner from long dead evildoer.

What next?
Well in the meantime I managed to get some oldie Undead (heh, history made a full circle - I got rid of of core of my Undead army like 10 years ago?) and I'd like to build small, oldschool army, based on ~4-5 WFB edition models, or at least 90s' stuff.
Don't think that will be gaming but should look just cool in the display case.

Ok, that's it for now. Time to plan the overall shape of Undead army. And play Dark Omen!

And just to keep things more less tidy - here are links  to prior Lich lord posts if anyone's interested: part 1, part 2, part 3 and part 4. See you soon!


Friday, September 11, 2015

Lich Lord (not Lichemaster though) - review and walkthrough, part 4

Slowly  we're reaching the end of the journey.
Thank gods for that...

Anyway this time I managed to:
- paint main (dead) body of the cart,
- attatch it to the base,
- attatch it to the apocalypse pony,
- paint the base.

Working on the cart main structure was hard - not mentioning problems with manipulating based model it was simply boring: there's lots of skulls and bones to paint. I decided to paint the cargo with dirty tones - browns and chalks were addsed to glazes and washes to make the thing look natural (as much as natural pile of remains can be that is).
Same chalks were added for shading wooden and metal elements - such thing makes the piece look coherent.

At this stage lich is not much more than some rags and handful of bones so it was painted black - the dark cherry on Nagash's birthday necro-cake. I thought that should make it pretty eyecatching - dark character sitting on a top of much brighter bones. The banners will also be bright - no idea what tone at this moment though.

As mentioned above model was attached to the base - lots of greenstuff was put under wheels and to connect cart with the horse, but it was absolutely necessary. It is supposed to be gaming model and because of nature of the sculpt - solid pinning was not an option.

The base itself is just sand washed with browns and olives and then drybrushed with bright olive and bleached bone. there will be artifical water in the hole but it's the very last step. I will also sprinkle some dirt / mud  but again - whole thing must be painted first.

What's left?
Apart from basing there is a zombie which lich is raising from the deaders pile (no idea what's he doing actually, I know he's grabbing zombie's neck), there's a skeleton holding ye magick booke (I will paint it nice and clean, dry bones - better contrast with rest of corpses) and of course: banners.
Frankly I wouldn't mind if those were just stripes of leather (maybe something like Lichemaster's cloak) but banners with sculpted patterns should also look decent. I think I will paint them like rotting flesh - that should look striking and make the rider even more visible.

Piccies time. The next post should be the last about this case:


Deeply hope the next post will be the very last about this case.

Friday, September 4, 2015

Lich Lord (not Lichemaster though) - review and walkthrough, part 3

Hey again, the painful adventure continues.

Since the last time I managed to slap some paint on the lil' skellie and the pony.
That doesn't seem to be much but this model doesn't want to cooperate at all. There are minis you enjoy painting and there are the others.
Chariot of the Harvester is one of the others.

Since there was not much painting there cannot be much babbling (this time).
I painted the dead kid first - it's nice accent, pretty wicked. This character is just some bones wrapped in dirty rag so paintjob is neither spectacular, but the sculpt is cool:
it's very delicate - there's lots of fine details. There's also creepy bit - the skellie is carrying skeleton-ragdoll on it's right arm.

There was more fun painting the pony.
It was painted with olives and some broken reds for the contrast. It turned out rather bright but that should contrast nicely with dark base and dark chartiot frame.
This sculpt is very delicate - it's legs are so raw-boned I didn't dare to pin them. Instead I glued bars (or whatever the proper name of those bits of metal under minis feet is) straight into base. Model has already been varnished but I am planning to sprinkle some mud on it when the chariot is ready. Maybe not as much as on my Gone muddin' painting challenge entry but there still should me lots of mess.

Ok, pics time. And speaking of rotting ponies - clicky!


And that's how big the thing will grow.
It will be more impressive because of large banners on each side.
Really cannot wait to see it done... No more Gamezone. Speaking of which - I should have spare GZ knight (a'la EE Empire / Bretonnia) if anyone needs.


Laters!

Monday, August 24, 2015

Lich Lord (not Lichemaster though) - review and walkthrough, part 2

So here's the second part of my adventure with painitng Lich Lord.
Painful adventure as it turned out...

The next step is basing:
in case of "ordinady" models (that is: minis which cooperate with me instead of just being pain in the ass) I prepare the base, mount model on it and even sometimes - paint it first. The matter of personal taste that's all, basing is just fun.

In case of this one everything was more tricky:
model is made of several parts, it's pretty unbalanced and heavy which made painting it already based impossible. Assembling it also wasn't easy (lots of greenstuff was used to fill the damn gaps and make bits stick together) so in my opinion painitng the parts separated and assembling them later would not me a good idea.
So the decision was made to paint a pony and dead girls already on the base and other parts - separated. Base itself will be painted as the last thing.

As you saw in the first part of the walkthrough I used placcy GW regiment base: it's big enough for a chariot and it also has borders around so it's fine for applying artifical water. Weird thing: I was taking pics from the very beginning but when pics were downloaded it turned out some of them were missing and other - very blurry. By some mysterious way autofocus was off. But I should've expected paranormal activity - it's lich after all...
Paranormal or not - I managed to save only pics below so as for stuff you cannot see you'll just have to believe in my babbling.

First the base was filled with cork (around place I chose for the "pond" to get irregular, natural edges) and ~5 mm thick foamcore. I must admit I chose foamcore only because it was easier to fill the space than cutting and assembling cork. Then everything was covered with 2 layers of white glue and sand.


Then I realised a wagon filled with dead corpses crossing swampy area would surely leave deep tracks rather than just gently step on the very top of sand layer. 
Like some sort of wicked necro-ballerina... Jumbo size...
Carving thick layer of sand would be pretty hard so just made 2 brownstuff "sausages" and made the tracks on the sand layer. In the end there will also be some vegetation, foliage and fallen leafs (lots of damp trash) so it should be no problem.


Everything as covered with sand again.
Damn you lich, damn you and your autofocus sabotaging!!!


I marked places where models will stand and drilled holes for the bars.
At this stage I was really happy I chose foam board: it's easy to work with but it's just great for pinning models into. Except in this case there will be not much pinning. Gamezone stuff I got is really thin and fragile I am quite sure any attempt of drilling would simply break the limbs. Pain in the ass.


And here's the first painting-patient: dead girl. 
Pretty wicked idea - you cannot see it on the pic but this litle lady is carrying skeleton doll on it's rigth arm. Some greenstuff was put into the hole in the base, then superglue applied, models was pressed into this and surface was masked with sand. Bulletproof bond.

This model will be kinda test model for swampy colors to be used. I want to keep whole thing in rotten / greenish hue but we'll see whan happens. Whan I know for sure is I will try to paint very dark, deep shadows on the chariot to hide all gaps I didn't manage to cover properly with greenstuff. Wish me luck.

Sunday, August 16, 2015

Preatorian stalkers family

Back again,

This time it's something rather quick: an update to keep the bloggy alive and fit.
I've been waiting for this piece a long time and it's finally in my hobby-bookcase: all 5 Warzone 1st edition rulebooks gathered in one grimoire.
I don't believe there are people playing oldie Warzone (except for Poland that is) but that's not the point: those books are filled with tons of stunning artworks and Mutant Chronicles fluff. All safe now and still fully operational - next game hopefully next weekend.

I also have some books from Warzone 2nd ed but there are still Mishima and Bauhaus expansions missing in the collection (from what I know tere were those + Capitol, correct me if I am wrong). If I even manage to gather that stuff another grimoire shall be spawned.  


There's even more Warzone this week!
After long struggle the praetorian stalkers are painted. I have mixed feelings about the team:
I am happy to see them finished - that's for sure. I tried like 3 of 4 times before with no acceptable effect, apparently some models refuse cooperation. Nasty bastards...
But now there are here - oldschool cyborgs of Algeroth varnished and ready for combat. I like them alltogether but honestly they are just some metallics + smurf faces. Not really the special look I was expecting from elite squad painted after so many years.

Hope you like them anyway.
What's new is the picture was taken under natural light only (looks like some Satandamn cloud made right side of it darker) but it turned out pretty ok - there's no light reflecting from the back wall. I think to get rid of reflections in the future I should either apply more sand/dust on the back wall or maybe paint some graffitti. At this stage it's just an idea - wouldn't like to ruin display base to quick.


And bit more Warzone abomination: brass apocalypt.
The original artwork is medicore but it's still the best thing: fluff is silly and the sculpt - not even my twisted taste. But it's still Warzone piece - old one and according to rules it's also tekron's bodyguard (Whitney Houston / Kevin Costner thing you know). I like tekron so I also like his buddies.
Once again - daylight only.


That's it for now - the Lich Lord is calling! Lots of greenstuff and pain in the ass ahead...