
Hey,
Last night, while waiting for washing machine to finish the job, I managed to paint the tank commander and therefore - finished another Necromunda dedicated vehicle: "Mjolner".
It's another tank after "Dagon" Hellhound which will join very slowly arising warband based on Valhallans models. I've always liked siege tanks - Vindicator, Griffon or Demolisher but converting own model is bit more fun than just painting, so here's short walkthrough.
It already has some fluff, stats and spec rules made up but I'll keep it for further post - the beast has to pass some serious field tests in the gaming spot.
So I started by getting secondhand Rhino - previous tank was based on Chimera so it was now time for change. Not much more to add at this stage.

Lucky for me the previous owner wasn't too generous with applying superglue - ripping off all the junk was no problem.


At this stage I had more less the idea what do I want to achieve in the end - story is field mechanics replaced front crew section with cannons, engine was moved to the middle and the 2-men crew sits in the back. Cannon exhausts were made of steel mesh.

PCV sheet was used to fill the front gap and back wall - it's cheap, easily available and really easy to cut and glue.

And some more bits were added:
dozer blade from Chimera, Rhino hatch, Hellhound fuel tanks, oldie Imperial Guard commander plus some other small bits. I tried to keep the construction simple and believable (that it was constructed in the field etc).


I tried to apply paint similar way to Dagon so the job was done with airbrush, 3 brown tones and some masking filter. The idea is simple: you paint basic tone, then apply some masking filter, another tone, more filter, final tone aaand...


Voila!

Model was way to cute so some decals were applied, some chipped paint applied and washes.

More chipped paint...

Mooore... This time also some chalks were added.

And it turned out I've overdone the dirt. Wanted to keep it more-less clean but what the hell, it's fully operational, working battle engine.

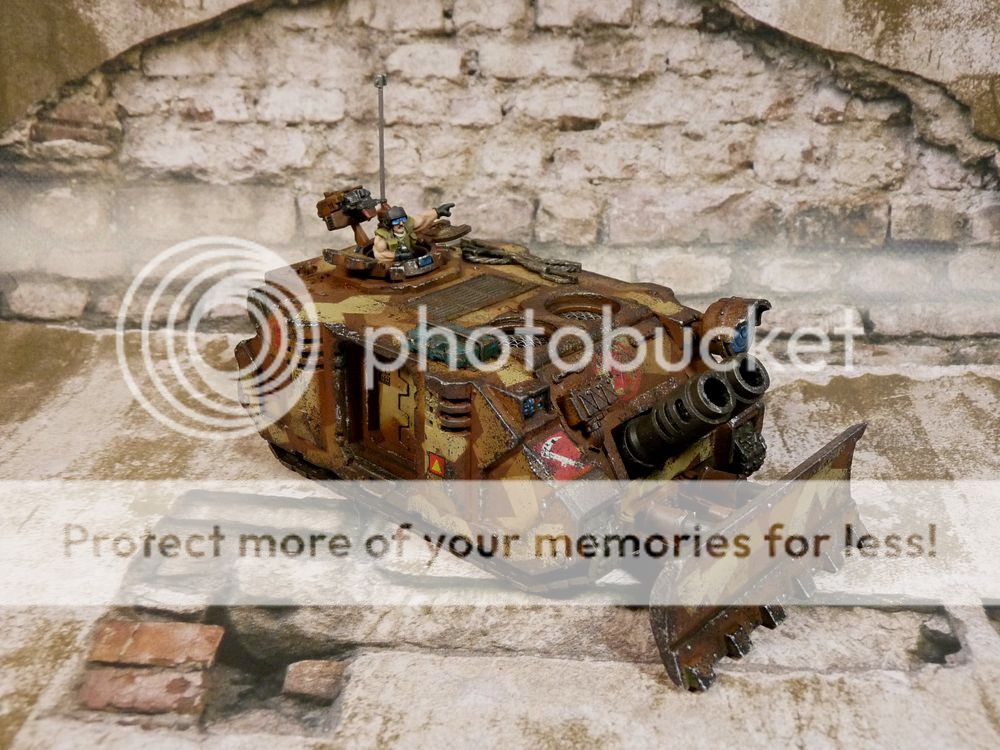
Model waiting for the commander...


And here it is!
Once again I had some problems with getting proper camera settings - I think taking pics while daylight is available might be better idea than working with artifical light about midnight.
All in all I think I like the final result, the next time I'll try to apply less chalk. Hope you like it.


Laters!
WOnderful, nothing like camo rhinos when they're as nice as yours !
ReplyDeleteThanks a lot mate! =]
ReplyDeleteI have one more Rhino/Predator chassis so the plan is the last one will be kinda anti-aircraft piece.
We'll see if I can get some more vehicle bits by that time.
Awesome work on this one!
ReplyDeleteI think I'll be stealing that camo technique :)
ReplyDeleteNicely done bro!
Hehe, feel free to do that :)
ReplyDeleteIf you want exact colors I used:
1. Bright one - light brown + khaki brown
2. Medium - camo light brown + green brown
3. Darkest - medium brown + black brown + mahogany
All from Vallejo Air line.
Wow, not only the conversion is great, the paintjob is awesome! Really cool tank, man! :)
ReplyDelete