

Some time ago I was asked to write a few words about making base used for my chaos knight of Nurgle. That was no problem because there are some minis (lots of minis to be honest…) waiting for bases on my desk. One of them is Leviathan from Privateer Press range waiting for the swampy base so without more useless babbling – here we go!
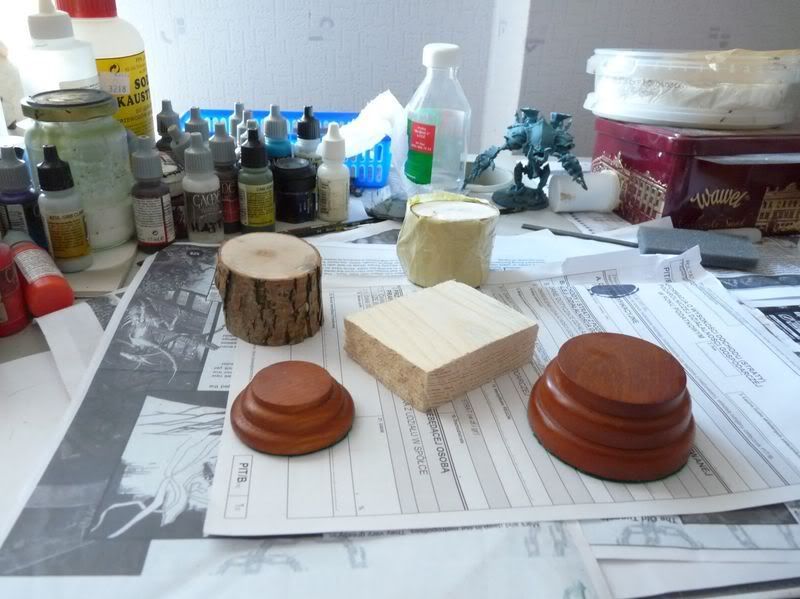
What will you need?
First of all some tools for modeling your base: wallpaper knife and sandpaper, if you have access to grinding machine (hope it's the proper name of that power tool) if will save you lot's of time. As for chemicals: milliput and greenstuff, superglue, white glue, artifical water, some paints (natural colors preferably). And most important the proper „ingredients” of the whole project: block of wood, some twigs, static grass, gravel, sand, small rocks, some skulls and whatever else you want to see on your swamp.
Preparations:
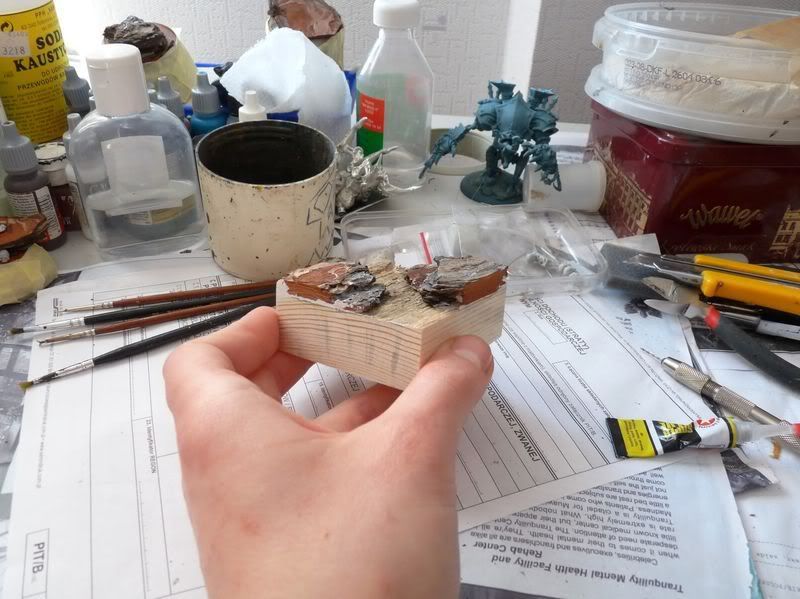
We have to start by choosing proper material for the base. There are many possiblities: you can use nice wooden / resin plinth, a piece of thick branch, block of wood or whatever else you feel comfortable with decided to choose piece of wood because even after painting it you can see wood structure through the paint.
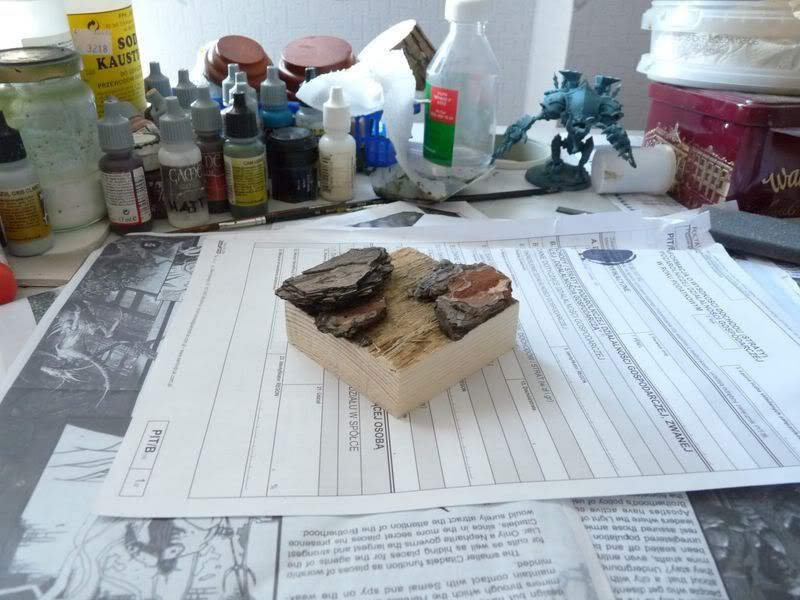
Using power tools I cut the wood to desired size and shape (Leviathan is pretty large model) and sandpapered sides and bottom of the base.
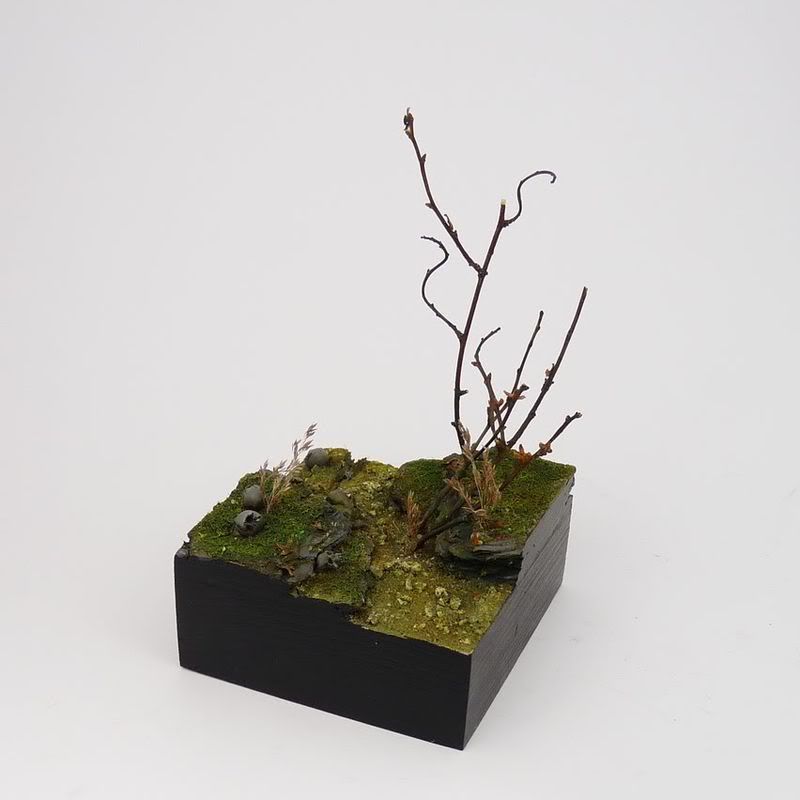
The idea for the whole project is warjack patroling the swamp. I wanted to show it’s „all terrain” abilities so I added rocks on both sides of the base. Tree bark is perfect for this. Don’t worry if it sticks out the base’s outlin, if really doesn't matter at this stage.
Filling the gaps:
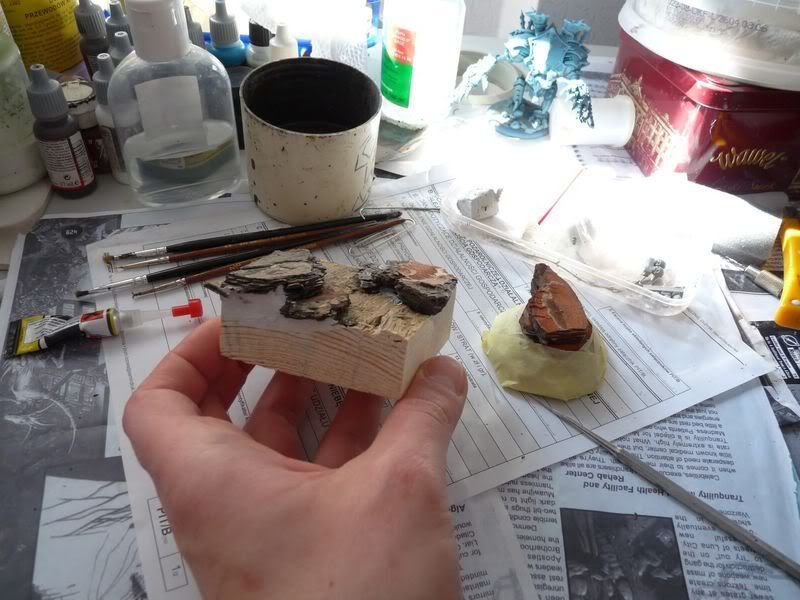
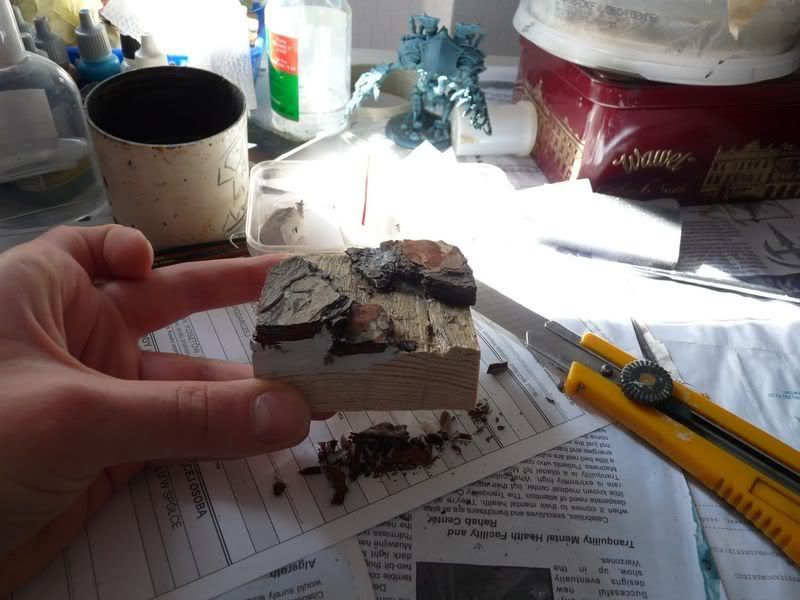
Becasue the base is supposed to be swamp I decided to sunk it under artifical water. To prevent resin leaking under bark it’s necessary to fill all gaps you can find. You can use greenstuff but I found Milliput perfect for this because you can sandpaper it after it dries. After modelling mass was 100% cured I cut off all bark remaining out of base’s outline with wallpaper knife. The next step was smoothing sides of the base so the base and bark are one smooth surface. Once again power tools were more than handy.
Adding details:
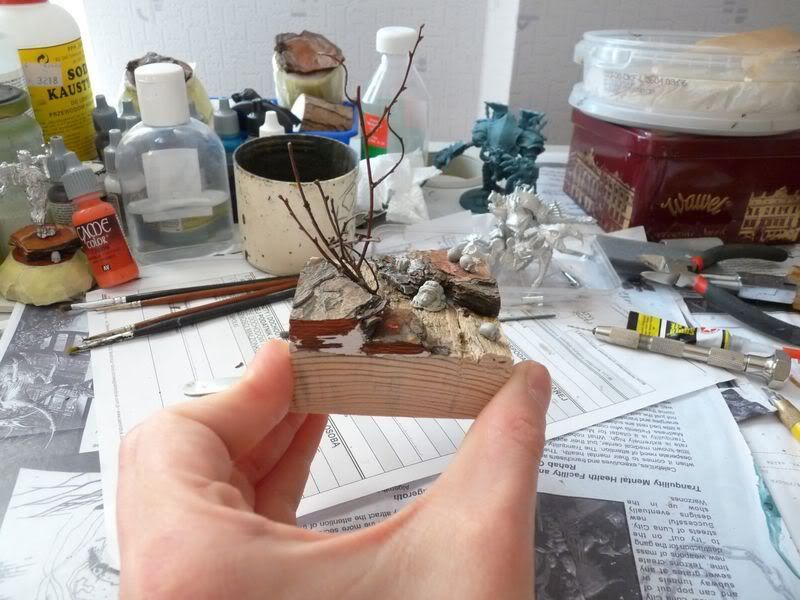
The basic shape of the diorama is ready so I could mark places where Leviathan will be standing (orange spots). I usually don’t do it but Leviathan isn’t the easiest model to assemble especially if the legs stand on different levels. At this stage I also added some „eyecatching” elements: some twigs as vegetation, toad and skulls:
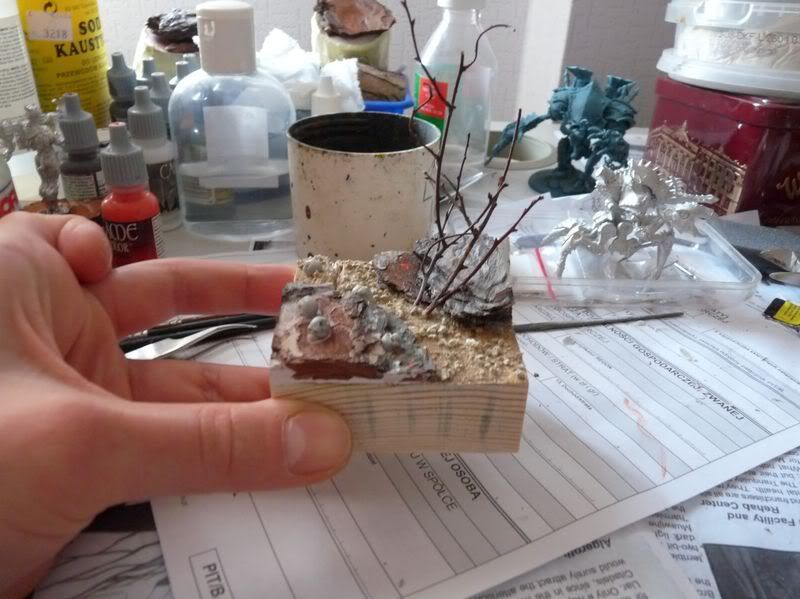
Sand and grass:
Now sand and a bit of fine gravel were glued on the bottom. I didn’t want to add much elements here (except for the toad of course) because this area will be sunken after Leviathan is painted and based. The tip: when you are using white glue it’s good idea to dilute it and paint bark with the mixture – bark is fragile and the glue should prevent any damages caused by drybrushing for example. The last thing to add before painting is static grass and some small leaves. I add it before painting becasue I don’t like original color of static grass and want to redo it a bit.
Painting time!
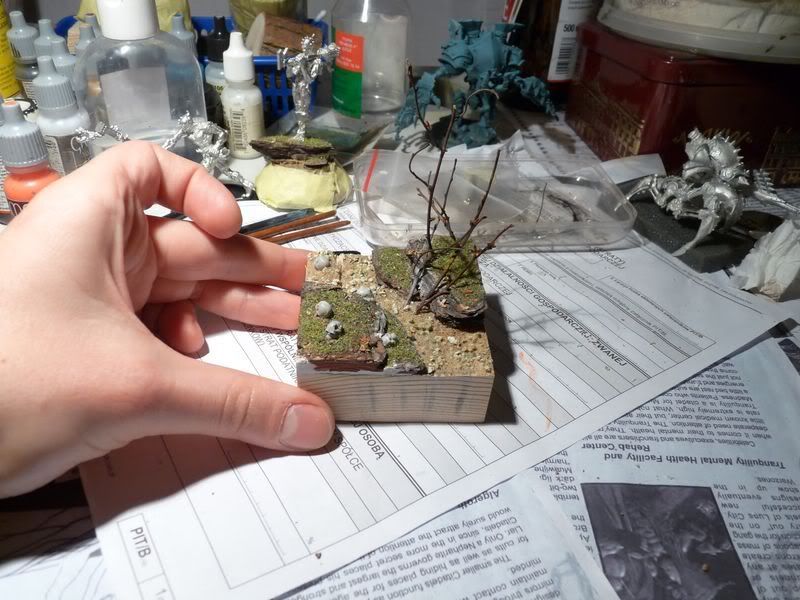
Painitng bases turned out easier than I expected. I started by covering whole base with watered down mixture of olive, a bit of blue and brown. That will make good basecoat, provide shadows in cavities but most important unify all elements. It’s good idea to use the same (or at least similar) colors on the model which will be placed on base so whole piece will be optically coherent. Next step was glazing sand on the base with very diluted yellow – that makes the bottom brighter and more visible under layer of artificial water. I also drybrushed grass with bright green and yellow to make it look more „fresh”. The last thing was painting details – skulls and toad. You can paint skulls probably whatever color you like – in Diablo PC game one of skeletons type was black/gray so I decided to paint it similar way.

The end?
The base is done – the last thing to do is painting sides of the base black and adding some more foliage (photo). I didn’t want to add these plants earlier because whey are very fragile and could be easily damaged while painting . You can now place the model on the base ooooor…
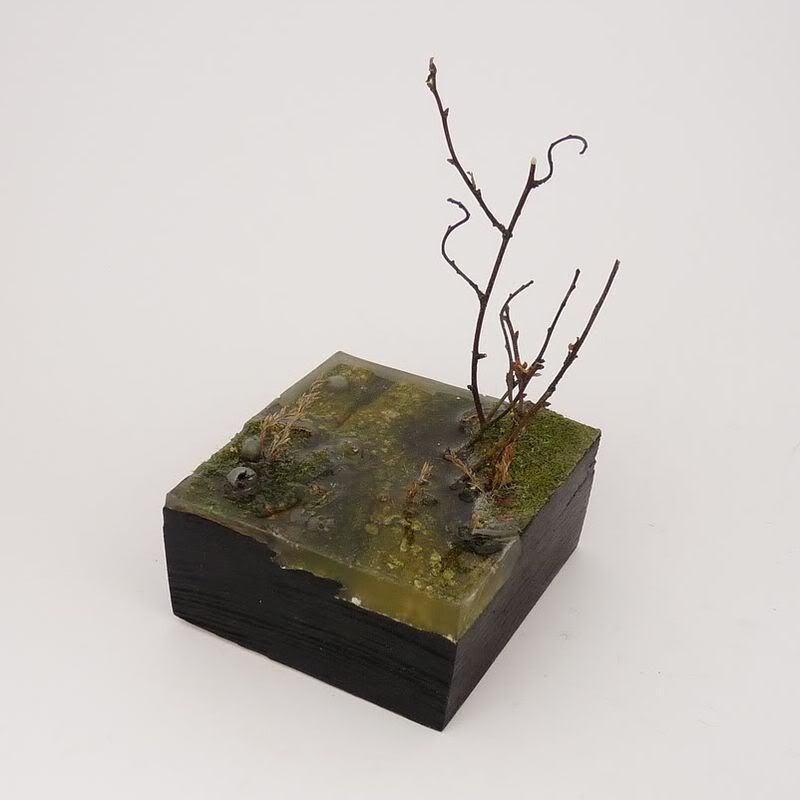
Add water effect!
To do that you have to secure edges of base with masking tape (make sure you do it really well because artificial water leaks out vey easy) and pour water onto the base. After it completly dries you have to remove the tape, polish the edges and voila!
And below you can see my Leviathan hunting for everyone who dares to distrupt Toruk's rest... At least everyone in my glass case :)
Like it my friend, great tutorial. Just want to know what kind of artificial water do you use? This is still technique I'm not familiar with...
ReplyDeleteIt's Andrea water - it's expensive but I've learnt it (hard way...) using cheap substitutes just doesn't pay off... It took me ruining 2 minis to learn that :)
ReplyDeleteHi there, very nice tutorial. Excellent step-by-step description. The pics are also perfect and illustrate everything very well. Thanks for taking the time to post it here.
ReplyDeleteNow, I would be on cloud nine if you made a tutorial on painting black armour. I saw some really great works in your gallery at CMON and absolutely love this effect of rough texture that you get on the Cryx minis. Not to mention the rust effect which is also superb ;)
I painted black armour??? O_o
ReplyDeleteAll right, maybe I didn't make myself clear - I meant the way you painted armour on the Cryx jacks, i.e. Harrower, DJ. Black is perhaps not the right word to describe it but what I meant to say is that this dark look you got looks pretty cool and I'd be nice to get some hints on painting it ;)
ReplyDeleteSure! Next weekend I have to go to Univ but after that I can post new material here :)
ReplyDeleteCool, I'm looking forward to seeing it :)
ReplyDeleteCześć (rozumiem że właśnie wypełniasz PIT'y :) )
ReplyDeleteAnyway. I love this tutorial. One thing threw - I did similar thing and noticed a thing you have here as well - the sides of the "swamp" aren't as transparent as the rest - this is because you used something as a form that reacted with the resin - try using a silicone - you will need an ideal shape to make a form with and then you put your base to the silicone form and pour the water thing - this will end up being really smooth just like the top surface
anyway really nice model!
Woah! Thanks for the tip!
ReplyDeleteIndeed I have problem with achieving transparency on sides but I have no idea how could I make silicone form for the base.
Maybe using some pcv or cardboard and then covering the surface with silicone?
Any ideas?
Also - is there any way I can get email notifications about comments posted on the blog? :)
Stunning work!:) I have one question, after you have done the swamp base, how do you place the model? Does you have to drill out place for it legs or do you fix the model to the base and then put on the water effect?
ReplyDelete